Easter Nest Cake

Baking

Here is the perfect recipe to try this weekend… 

It’s our family’s Easter tradition – we have it every year since we were little! 

Have a go and don’t forget to tag me on your bakes on instagram – @mariablackstone


Ingredients 

6 oz stork margarine (could use proper butter) 

6 oz caster sugar

6 oz self raising flour

3 eggs

1 Tsp vanilla 

2-3 tbsp cocoa

1/2 bar Belgian milk choc

1/4 pint double cream 

4 flakes

Bag mini eggs 

Method

1. Preheat oven to 180*c / 160* fan. Grease and line your tin, I used a ring mould but a deep round 8 inch tin would work well. 
2. Cream the margarine and sugar together until pale and fluffy.

3. Add your eggs one at a time, beating thoroughly in between each one. If it curdles, add a spoonful of your flour.

4. Add your vanilla, then fold in your flour until just combined.

4. Spoon half your mixture into the tin in blobs around the base of your tin.

5. Add a couple of tablespoons of cocoa to the rest of the vanilla mix along with a drop of water (about a tablespoon) and mix together until smooth. It should be a nice chocolatey colour.

6. Add this mixture in blobs in between your vanilla mixture in the tin.

7. Using a skewer or knife, swirl the two mixtures together to create a marbled effect.

8. Bake for 20-25 minutes (dependent on which tin you use, it is cooked when springy to touch and a skewer comes out clean when inserted into the centre. 

9. Leave to cool, meanwhile make your glaze.

10. Melt the milk chocolate and cream in a heatproof bowl, either in a bowl over a pan of barely simmering water (ensure the bowl does not touch the water) or in short bursts in the microwave. 

11. Once fully melted, leave to cool slightly so the mixture thickens up to a nice pouring consistency – it should be thick enough to coat the cake.

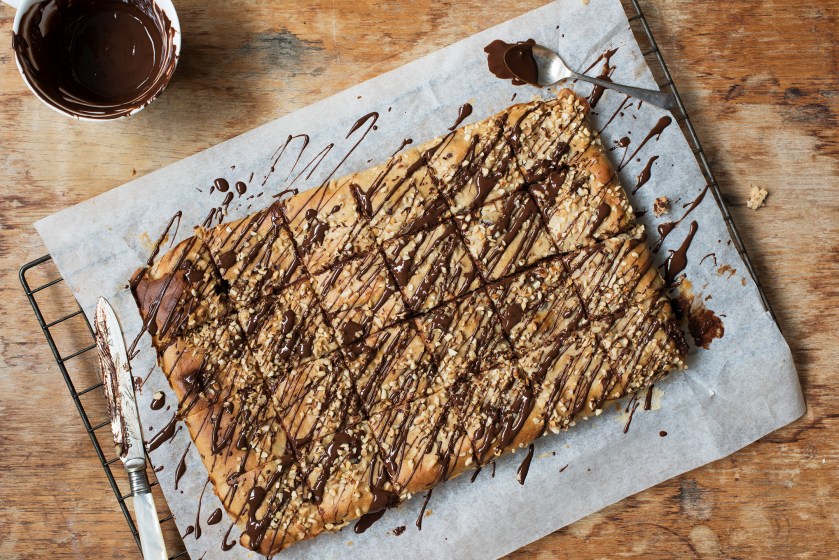
12. Place the cooled cake on a cooling rack with a tray underneath and pour over your glaze. 

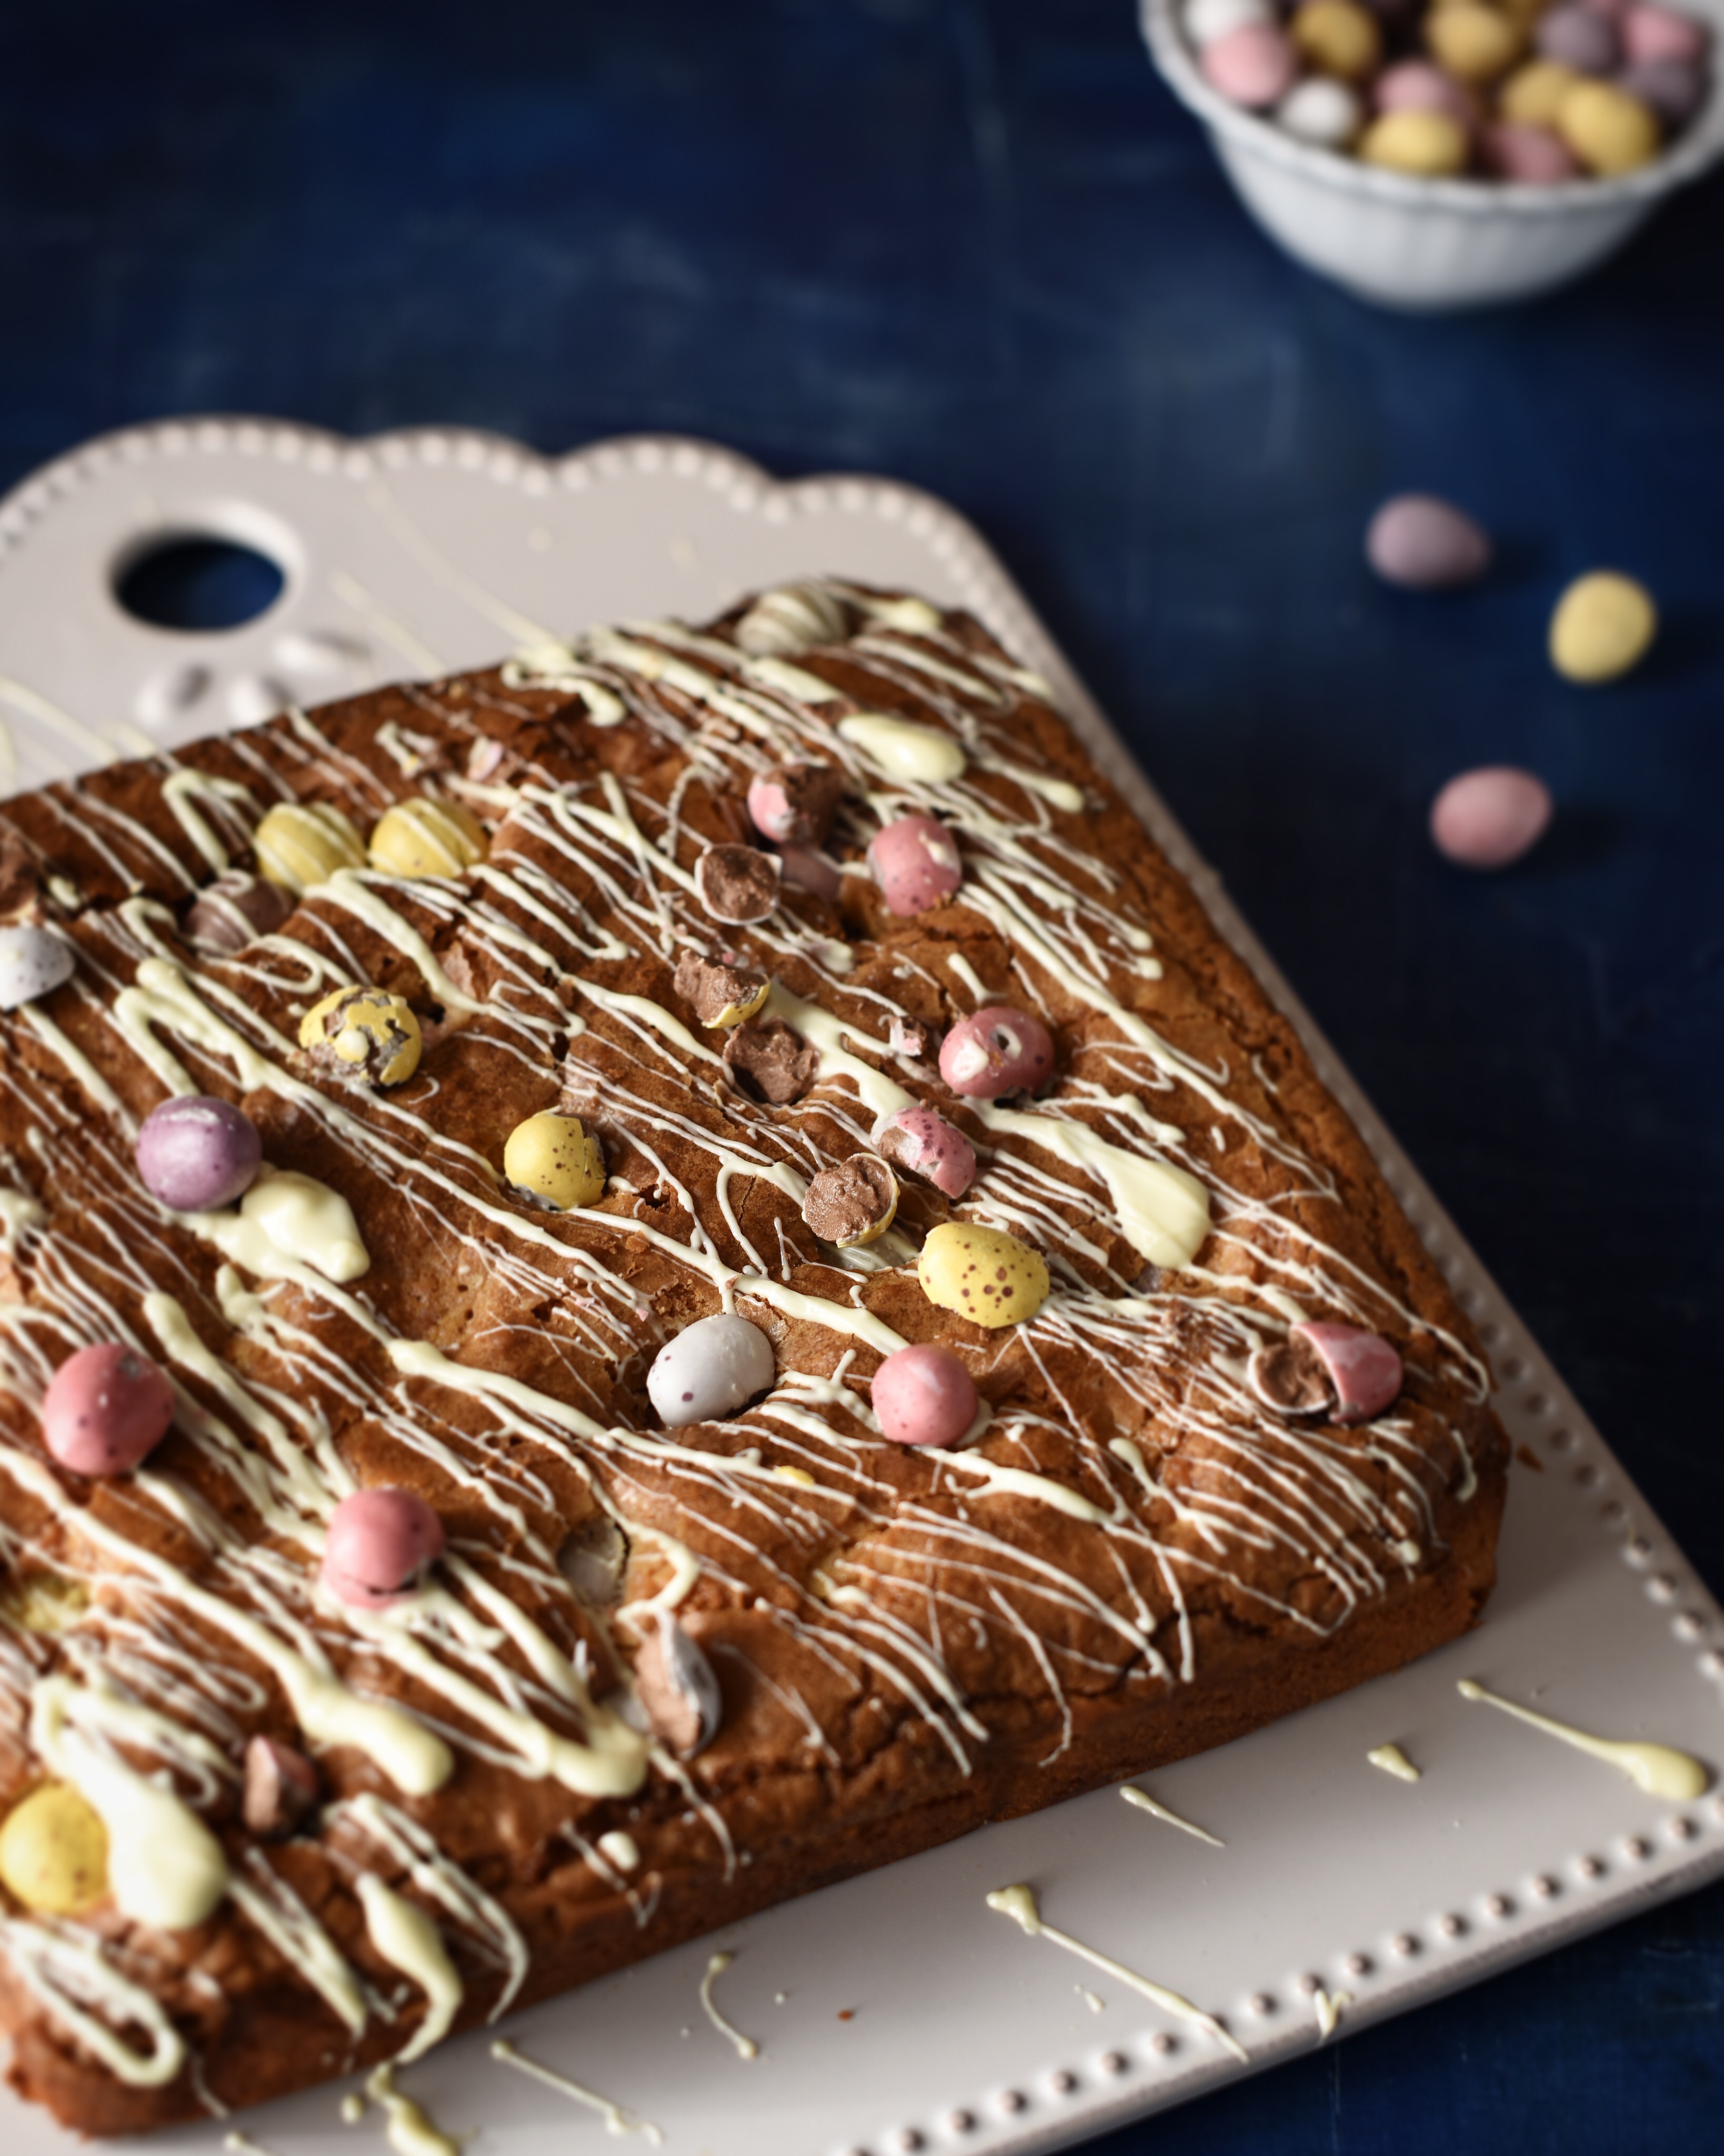
13. Once covered, chop up your flakes and top the cake to create a nest effect. 

14. Top with mini eggs, and enjoy!


A girl with an appetite for all things creative, 

Maria x

Mini Egg Blondies

Baking, Photography

Hi Everyone, 

Here is an easy and naughty treat to enjoy over the Easter holidays! Perfect to use up  any left over mini eggs – but if I’m honest, it’s more of an excuse to go and buy more mini eggs! 

I was really pleased with how the photos turned out for these. I baked them yesterday evening, by which time all the natural light had gone (I think I was being ambitious, thinking I could make, bake and photograph them in the natural light after I got home from work at 6.30pm!) 

I decided to experiment with flash, I set up the background, put the finished bake in place, though a little warm (I was eager to get to bed) and got the work. I haven’t really shot any food with flash before, apart from my studio arrangements at university. I will definitely continue to practice with this technique as it means I can photograph and cook more for my blog in the evenings. 

My photography work can also be viewed here.

Beautiful background by Woodrow Studios

Ingredients

225g butter

200g white chocolate

175g plain flour

50g golden caster sugar

150g soft brown sugar

3 large eggs

1tsp vanilla extract

2 x 90g bags mini eggs

For decoration (optional)

3 cubes white chocolate

Handful of crushed mini eggs
Method

  1. Line a square tin (approx. 21cm square) and preheat the oven to 180*c / 160 fan.
  2. Chop the butter and chocolate into cubes and melt together in a bowl placed over lightly simmering water. The mixture may split once melted but don’t worry, this will all be combined together into one delicious mixture. Once melted, remove from the heat and leave to cool slightly. 
  3. In a seperate bowl, whisk together the eggs, sugar and vanilla until pale and fluffy, you’ll want it to leave a trail on the surface when you lift the whisk. This should take a few minutes. You will probably want to use an electric whisk or mixer for this other wise you’ll be there all night. 
  4. Pour your chocolate and butter into the egg mixture and gently combine together using a spatula. 
  5. Add your flour and fold in until well combined. 
  6. Add your mini eggs and stir.
  7. Pour into your lined tin and bake for about 30-40 minutes depending on the size of your tin. It’s cooked when you can insert a skewer and sticky cake crumbs are left but no raw cake mixture. 
  8. Leave to cool, then drizzle with some extra melted white chocolate and top with crushed mini eggs.
  9. If you can resist, leave in the fridge or somewhere cool overnight to achieve a delicious fudgy texture. In the mean time you can polish off the remaining mini eggs. (Yes, I purposely bought a family sized bag just for the decoration, don’t judge) 
  10. Enjoy! 

Don’t forget to follow my instagram to keep up to date with my foodie adventures. 

A girl with an appetite for all things creative,

Maria x

Banana, cashew butter & dark chocolate tray bake

Baking, Recipes, Uncategorized

Long time, no posting!

I’ve decided that this year I am going to start trying to be kinder to myself.

Yes, I want to loose weight and look great (I am off to Sri Lanka in 4 weeks and still don’t have my bikini body) but as young women there is so much pressure to be a certain way, and I simply get miserable when I realise I don’t fit the bill.

I read an article by Angelica Malin on About Time Magazine. Check it out here – she mentions that we all need a re-tox. A fabulous idea, which got me thinking. Instead of being so hard on myself I will change my outlook on life. I will do more exercise because I enjoy it, and not beat myself up when I’m too tired to go because of my fatigue. I will not eat all the biscuits at work because they are there and I’m bored. However, I will have a few cubes of chocolate in the evening because I really need something to satisfy me. Life is about balance, and if I eat healthy food that I really enjoy, go swimming and to the gym, because this lifts my mood and makes me feel fabulous, I can still eat a slice of cake or a dessert at the weekend because I really want it.

We all need to be kinder to ourselves. We all have busy lives, life is too short to spend hours in the gym, and deprive yourself of that bit of cake that you REALLY want but shouldn’t eat because your Instagram feed is full of pictures of girls that have better bodies than you.

Saying no to something simply makes us feel guilty when we do have it, and we only want it all the more because someone tells us we shouldn’t. So have that bit of cake, chocolate bar, or that biscuit that you want to dip into your mid-morning cup of tea. Just don’t go crazy. Life is all about balance!

Anyway…

I wanted to take a picture of something today, and thought about making a banana traybake with some black bananas that have been floating around the fridge for a bit too long. This is made with out sugar or butter/fat so a little bit better for us but still delicious. It has a texture between a traybake and blondie. I had a piece tonight with some warm custard. Really quick and easy to whip up, and great to pack into your lunchbox for an afternoon sweet-treat.


Ingredients

  • 2 ripe bananas – mashed (the blacker the better)
  • 60g sweetener – I used Sukrin Gold, as this is similar to brown sugar. You could substitute this for light brown sugar, or an alternative sweetner.
  • 120g full fat Total Greek yoghurt
  • 1 large egg
  • 5 tablespoons milk
  • 115g cashew butter – you could also use peanut butter
  • 220g self raising flour
  • 1 tsp cinnamon
  • 1 tsp vanilla extract
  • pinch of salt
  • 100g dark chocolate – chopped into chunks
  • 25g chopped, toasted hazelnuts

To decorate – 3-4 cubes dark chocolate, melted

Method

  1. Preheat your oven to 180*c/160*c fan and line a tin with non-stick parchment paper.
  2. In a bowl mix together the banana, sweetener, yoghurt, egg, and milk until well combined.
  3. Add the cashew butter and vanilla extract and mix again.
  4. Fold in the flour, salt and cinnamon.
  5. Mix in the dark chocolate chunks.
  6. Pour the batter into your lined tin, smooth out and push all the way to the corners.
  7. Sprinkle the top with the toasted, chopped hazelnuts
  8. Bake in the oven for 15-20 minutes or until it’s springy to touch and a skewer comes out clean.
  9. Remove from the oven and leave to cool. Once cool, use a fork to drizzle the top with the melted dark chocolate.

banana-tray-bake-1-web-copy


Enjoy it,

A girl with an appetite for all things creative,

Maria x

Food Styling & Photography Masterclass

Food, Photography

Hi everyone,

Last Saturday (17th) I was lucky enough to attend a masterclass in food styling & photography run by the Guardian. After a bit of a shock alarm (not used to an early wake-up call on the weekends) I got up and headed to the swanky Guardian offices at Kings Cross.

After a cuppa, we made a start. We all introduced ourselves – lots of professional photographers, beginners & all levels in between but we all had one thing in common though I think, which was enthusiasm. We were then introduced to the lovely ladies running the masterclass – Jill Mead; Photographer & Rosie Reynolds; Food Stylist. They made everyone feel so very welcome. I learnt lots of tips in the talks they gave us & it was so lovely to hear them talk so passionately about their subjects.

Figs.jpg

We then had a practical demonstration, where I picked up some tips on lighting & a bit about the best lenses to use. I now want a macro lens so I better get saving those pennies. I also did however, feel that I knew quite a lot of what was being spoken about which was great for my confidence as I don’t always believe in myself. All my practising and constant research is obviously working!

After lunch (which was fabulous, I had mushroom stroganoff, salad & chocolate cake) we started to take our own photos. We bought along a selection of our own props and were provided with some scones, fruit & veg, jam etc. I didn’t really feel like my practical session was on my side that day, I took a few photos but I think the most valuable part of the day for me was the talks in the morning and in fact sharing my knowledge & ideas with others & looking at others work & finding out about what they do. I wasn’t at all disappointed that my practical inspiration wasn’t on my side that day, as I gained so much!

I am looking forward to going on a shoot with Jill at some point in the near future.

For lots more foodie pics & to see what I get up to follow my Instagram –  @mariablackstone or Twitter.

A girl with an appetite for all things creative,

Maria x

Plum Jam

Food, Recipes, Uncategorized

One of life’s simple pleasures has got to be a slice of hot, buttery toast & homemade jam served with a cup of tea, or coffee on a drizzly weekend morning. Lazing around the house, in comfy clothes watching the rain drops fall on the window.

This jam for me was a bit of an experiment. I went to Garson’s Farm & picked some plums & bought some apricots from their amazing farm shop. The apricot jam, which funnily enough I thought would turn out better isn’t quite right. However, I’ve decided that you can buy it in the shops & it’s much less hassle. This plum jam however, tastes amazing which is good news, as I made about 5 jars.

I thought jam making would be quite easy, but turns out it was quite a stressful experience for me. I had to boil my jam for a fair amount of time, to bring it to the consistency needed. It was so worth it though …

 Ingredients

  • 1kg plums (I used Victoria plums) stoned & quartered
  • 1kg white, granulated sugar
  • 1tsp ground cinnamon
  • 100ml water
  • tbsp lemon juice
  • knob of butter

Method

  1. Begin by sterilising your jars, I washed mine in hot soapy water then placed them in a low oven to dry. Keep your jars warm here until you are ready to fill them.
  2. Place the plums and the water in a large saucepan, and cook on a low heat for about ten minutes until the plums start to soften.
  3. Add the sugar, cinnamon and lemon to the pan.
  4. Dissolve the sugar slowly, without boiling the mixture. This takes about ten minutes.
  5. Once the sugar has dissolved, bring to a rolling boil, and cook until reaching a jammy consistency. This is 105*c on a sugar thermometer. You can also test it, by putting some plates in the freezer, and spooning some mixture on the cold plate and leave to cool. It should wrinkle slightly when you push it with your finger. This can take anywhere from 5 minutes, but it actually took me about 25 minutes.
  6. When ready, take off the heat and stir in the butter – this helps to disperse any scum on the top. Leave to cool for about 10 – 15 minutes and then ladle in to your hot jars. Screw on the lids straight away to seal them, and leave to cool.
  7. Serve on hot buttered toast, or spoon into the bottom of a pastry case and top with almond cake filling for a delicious twist on a Bakewell tart.

It makes great gifts for Christmas, simply add a homemade label with some ribbon, or be greedy and keep all the jars for yourself.

Enjoy!

A girl with an appetite for all things creative,

Maria x


Happy Birthday Doris

Baking, Photography, Uncategorized

A cake I made for a friend’s grandmas 99th birthday. Happy Birthday Doris.

Vanilla sponge filled with butter cream & summer berry jam. Topped with fresh berries, macarons & fresh flowers.

If you’d like me to make you a cake, please get in touch.

DSC_2574

A girl with an appetite for all things creative,

Maria x

Spiced Rhubarb Compote

Food, Photography, Uncategorized

It’s that time of year again where gorgeous pink rhubarb is in season. I love roasting it and revealing its beautiful vibrant pink colour oozing with sweet juices infused with clementine, vanilla and spices.

I stumbled upon this recipe which I adapted from Waitrose when I was creating work for one of my final year projects at university. I created large arrangements from a recipes ingredients. The series is entitled Don’t Play With Your Food’ and depict a recipe’s ingredients arranged in a way to express the beauty of natural foods – their different colours, shapes, textures and characters. The other recipes I chose were Lentil Curry, Summer Fruits with a Lime, Mint & Vanilla Syrup, a Blood Orange & Beetroot Salad, and a Pistachio & Pomegranate cake. You can view the series here. The series stems from my passion for food and cooking. The images highlight that food is fun and enjoyable and aims to encourage people to think about the food that they eat in a similar way.

I adapted the recipe slightly – using some signiture spice from Waitrose, that was left over from Christmas. I substituted the cinnamon stick and star anise for a teaspoon of this.

Ingredients – see the original recipe here

  • 1 pack of rhubarb – cut into 5-6cm sticks
  • 2 clementines – one peeled, both cut into 1 cm slices
  • 1 vanilla pod – split lengthways with the seeds scraped out
  • 60g light soft brown sugar
  • 2 tbsp maple syrup
  • 1 tsp Waitrose signature spice (or you can use a mix of cinnamon, star anise, nutmeg etc)

Method

  1. Preheat your oven to 200*c or 180*c fan.
  2. In a roasting dish, add the rhubarb, clementine slices, sugar, vanilla (seeds & pod).
  3. Cover the roasting dish with tinfoil and roast in the oven for 15 minutes.
  4. Remove from the oven, add the maple syrup and return to the oven, this time uncovered and roast for a further ten minutes until the rhubarb has softened slightly and it’s perfectly pink surrounded by the cooking juices.
  5. Leave to cool and then enjoy!

This is perfect served for breakfast on top of yoghurt, the vivid pink rhubarb and its juices bleeding into the bleak white of the yoghurt. I tend to blend my rhubarb with a stick blender as my mum and I prefer the smooth consistency. For a dessert idea swirl some rhubarb through natural yoghurt or whipped cream and serve with meringue. It’s simply delicious.

Happy Tuesday!

A girl with an appetite for all things creative,

Maria x

Freshly Baked Bread

Baking, Food, Photography, Uncategorized

Nothing quite beats the smell of freshly baked bread filling the house. My dad is the bread baker in our house (sees himself as a bit of a Paul Hollywood, which is funny as he’s actually called Paul. He has taken over from mum and this loaf he made this weekend was pretty spectacular.

BreadBread 2

I decided to change things up on here, post pictures and maybe even some short films of food & things (especially now I’ve got my new camera). So there won’t always be a recipe but I’m hoping this small change will allow me to post more, be more creative and give you recipes that I’m really proud of, rather than rushing to put something crummy up (excuse the pun). If I don’t like this new way of doing things I’ll change it back!

A girl with a creative appetite,

Maria x

I have a new camera

Baking, Photography, Uncategorized

I’ve really fell out of routine with my blogging, during the summer I had so much free time and a lot more daylight (good for photography) so creating blog posts was fairly easy and a fun thing to do, then I got sucked into the world of work as a recent graduate and found it hard to find the time. However things are looking up and not only that but they are looking exciting. I have now been offered a job from my internship, and am enjoying having my weekends off after working a part time job at the weekends.

I have also FINALLY bought a new camera, lens and tripod. Something I’ve been saying I want to do since my second year of university. I never had the funds, as it is jolly expensive. With spending a lot of money (especially when you don’t have much) comes a lot of consideration and thinking. I finally jumped in though and got myself a beautiful Nikon D810 and a 50 mm lens. I used it last weekend and photographed these delicious brownies and my, is it a beauty of a camera. I’m excited to continue using it to create lots of beautiful images that I’m proud of.

This post is less of a recipe and more of an update of stuff, because sometimes I need to remind myself of what I’m doing and achieving. I’m currently doing some freelance design/photography work which is going well and it’s lovely to know that others think my work is good enough for them to use for their own endeavors.

I also have just entered the Pink Lady Food Photographer of the Year competition. I know that my chances are slim (or pretty much impossible) with the tough competition out there but as my mum says, to be in it to win it you have to play the game (or something like that, if any of you know my mum she has a saying for EVERYTHING).

I’ll leave you to feast your eyes on these delicious brownies, which were a Meringue Girls recipe from their book, ‘Everything Sweet’. They are made with coconut flour, which is a great gluten free alternative (but still taste extremely guilty). I swirled in some peanut butter and added in some frozen raspberries for some added peanut butter and jelly time. (I used to love that cartoon). They are extremely decadent and are in good competition to my go to Thornton’s brownie recipe.

Brownie.jpg

I will promise to try and be better with this blogging thing!

A girl with an appetite for all things creative,

Maria x

Emily Blincoe

Food, Inspiration, Photography

I stumbled across this photographer on one of my favourite sites This Is Colossal. I use this site when looking for inspiration to create work etc. Born in Austin, Texas Blincoe finds “inspiration in faces, shapes, colors, light and quiet little moments. most days you can find me wandering in the tall grass somewhere between austin and nashville with my dog, eleanor. ”

I love all of her work, but particularly her arrangements that she creates with food. She selects her food types and meticulously arranges them by colour. “Blincoe collects every color permutation of tomatoes, oranges, eggs, and even candy and then sorts them into groups and gradients for each image.” This inspired me to take my own images of singular food types in Borough Market, and I hope to take this into the studio, and perhaps do some similar arrangements as Blincoe. The images I have taken in Borough Market, try and capture one singlular food item in each frame, and I feel a series of these would be really successful, and I could experiment in the studio also with these same food types and compare them.

See more of Emily Blincoe’s work here.

A girl with an appetite for all things creative,

Maria x