Berry, Custard & Mascarpone Tart

Baking, Food, Recipes

Hello readers,

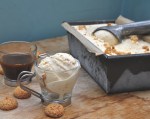
I am starting to get a handle on my job lists, after having parties and a trip to the Isle of Wight. I see a lot of you liked my Amaretto Gelato post last week, and next week I’ll have another alcoholic ice for you adults to enjoy (sorry kids!) but here’s a recipe you can all enjoy… a beautiful berry tart, perfect for using our beautiful British berries, that you may have picked yourself, with children or bought from the market or supermarket.

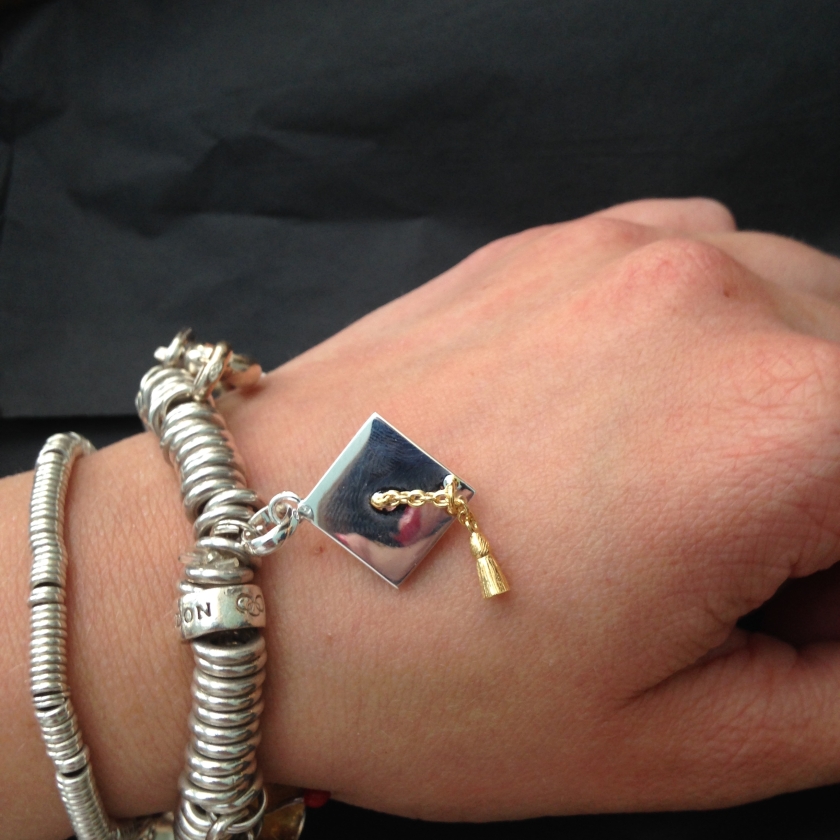
This weekend just gone, after getting back from a completely over indulgent trip to the Isle of Wight (what Grandma’s do best) I threw a small Barbecue to celebrate my sisters results from University. She got a 2.1 and I am so so proud of her, as along with studying, she worked full time, kept up a flat, found time for the gym and socialising with friends. There was about 10 of us, and we had a BBQ with the usual stuff, and then this tart, the biggest trifle you’ve probably ever seen and a surprise peanut butter and chocolate cake, which would have remained secret had my sister not gone in the garage! I had an amazing time with friends, food and drinks and we were also spoilt rotten. We each received a beautiful bunch of flowers, a Links of London Graduation charm, a Spa Weekend and £100. Thanks Mum & Dad! I may post up the recipe for the cake soon!

Berry, Custard & Mascarpone Tart

Ingredients

Pastry

225g/8oz Plain Flour

113g/4oz Lard

113g/4oz Butter

50ml (aprox.) Water

Custard (I only used half of this mixture, but why not use the rest in homemade ice-cream, or with sponge pudding. You can use all of it for a more custardy taste, or fill the extra tartlets with this mix and top with fruit)

300 ml Milk

2 Eggs + 1 Yolk

1 Vanilla Pod (or 1 tsp paste/extract)

90g Sugar

50g Cornflour

75g Butter, diced

1 Tub of Mascarpone

Assortment of Berries I used a 400g tub of Strawberries, and a mixed berry pack from Sainsbury’s (raspberries, strawberries and blueberries)

Method

1. Start by making the pastry. In a food processor (or by hand)blitz/rub together the flour and fats until breadcrumb consistency, then add the water until a dough forms, you may not need all the water, likewise you may need a little more, I’ll leave this up to you! Once combined, tip on to a surface, form a ball, flatten and wrap in clingfilm and leave to rest and chill.

2. Once chilled, roll out the pastry. Lightly flour the rolling pin and surface and roll out the pastry to a few mm thick. You want it as thin as you can make it, for a nice crisp result. I used an oblong tin, but a round one is fine. Roll the pastry onto the rolling pin and place carefully in your flan tin. Press the pastry into the edges using a wooden spoon handle, or your fingers being careful not to rip your base. Don’t worry if you do, just patch it up with some spare pastry. With any left over trimmings, you can make some mini jam tarts, or tartlet shells to fill with left over custard. Place the flan tin back in the fridge to relax, while you make the custard and remember not to trim the pastry right to the edge as otherwise it will shrink back.

3. To make the custard, place the milk, and split vanilla pod (scraping out all the lovely seeds) in a saucepan and bring to a gentle boil. In another bowl whisk together the eggs, sugar and cornflour until smooth and creamy. Once the milk has come to the boil, leave to infuse for ten minutes.

4. Brink the milk back up to the boil, then whisk into the egg mixture. Return back to the saucepan and whisk continually until boiling, and really thick. Then add the diced butter and whisk in until melted and smooth. Place in a bowl, and top the surface with clingfilm (ensuring its in contact) to stop a film forming. Leave to cool then refrigerate.

5. While the custard is chilling, preheat the oven to 180c fan/200c, fill the pastry case with parchment, and baking beans/rice/pulses and blind bake for 10-15 minutes. After this time remove the paper & beans and trim down your pastry if you so wish. Return to the oven and bake for another ten or so minutes until the pastry is nice and golden. Leave to cool.

6. When ready to assemble, mix half the custard with the mascarpone, you may want to use an electric whisk to get a really smooth consistency or just use some muscle and burn the extra calories. Spoon in the tart and smooth evenly over the pastry – don’t worry about this looking neat as you are going to pile it with berries.

7. Add your berries, I chopped the strawberries in halves and quarters for the bottom and added the raspberries and blueberries! This creative bit is up to you! Which is why I love to cook. Make it your own!

Keep your eyes peeled for next weeks post, a refreshing G&T sorbet! Time for me to go back to the job hunt! Wish me luck!

A girl with an appetite for all things creative,

Maria x

Amaretto Gelato

Food, Photography, Recipes

Hello lovely readers,

I hope you are all enjoying your summer, even if the weather is temperamental! Today I have a lovely recipe for you on a lovely summer day, or something to enjoy to remind you of the sun even if it isn’t out haha!

I use my vanilla base recipe from an ICES book that I have, for the smoothest vanilla ice-cream, and this recipe was simply one of my experiments, as we tend to have affogato a lot in our house, so this recipe was an extension of this.

Affogato Dessert

A couple of scoops of vanilla ice-cream (homemade or good quality shop bought)

Sprinkle over some crushed amaretti biscuits (crunchy or soft)

Pour over some freshly brewed coffee, or instant if thats all you have

If you’re feeling naughty why not add a splash of your favourite liquor – frangelico, or amaretto would work well.

IMG_1134

So this recipe I’m posting today is simply a combination of the liquor and biscuits, that would be lovely served with coffee, as an ice-cream float or simply on its own!

For best results you’ll need an ice cream maker for this, to get a really smooth luxurious ice-cream, but failing this whisk the double cream before combining with the custard – this will ensure the mixture is thicker. Then pour the mixture into a tub, freeze and hand churn by removing the ice-cream at regular intervals and whisking up to remove any ice crystals, continue this until fully frozen – this may result in a less smooth gelato.

Ingredients

300ml Milk

100g Granulated Sugar

3 Egg Yolks

1tsp Vanilla Bean Paste/Extract or 1 Vanilla Pod

Aprox. 284ml Double Cream (I used Elmlea)

100ml Amaretto Liquor, I used Disarrano

A few handfuls of crushed Amaretti biscuits (crunchy)

Method

1. Combine the milk, vanilla and half the sugar in a saucepan and bring to just below boiling point. Remove the pan from the heat, and set aside for about 15 minutes to infuse the vanilla into the milk.

2. In a heatproof bowl, whisk together the egg yolks with the rest of the sugar and beat until thick and pale. It’s best to use an electric whisk for this, but if you don’t have one just use a little elbow grease – think of all the calories you’ll save, ha!

3. Bring the milk back to the boil, then slowly pour the milk into the egg mixture, ensuring to whisk steadily as the milk is added – we don’t want to end up with scrambled eggs.

4. This bowl can either be placed over a bowl of simmering water, or you can return the custard to the saucepan. If you are going to use the second option, ensure the pan is on a heat diffuser and use a thermometer to ensure you do not overheat the custard. Use a wooden spoon, or spatula to continually stir the custard untill it reaches 85 degrees c, or is thicker in consistency. It should coat the back of the spoon, and hold its shape when you run your finger through it.

5. Once cooled, mix in the double cream and liquor.

6. Pour into your ice cream maker, and once thickened, add in your crushed amaretti biscuits. Continue to churn until thick as possible.

7. Pour into a freezable tub, and top with a few more roughly crushed biscuits. Freeze until ready to serve.

This recipe is quite simple, when you follow the steps, what you’ll have at the end of it is an incredibly rich and smooth ice-cream like you’d get in those fancy pots from the supermarket, or at a counter in Italy, but it always tastes better when you make it yourself don’t you think?

Stay tuned for some more lovely recipes! I’m in the Isle of Wight this week, visiting my grandma, but will be back creating and posting recipes next week!

A girl with an appetite for all things creative,

Maria x

Wimbledon Strawberry & Lime Tarts

Baking, Food, Recipes

Wimbledon Tennis commences on the 29th June, and is one of the sports I love to watch, it reminds me of summer and I always admire the players’ strength and determination – they are the only person responsible for their win and I think that takes a lot of mental strength let alone the physical strength. I have always been pants at sport so I admire most sports men and women to be honest with you (also a bit jealous).

When I think of Wimbledon, I think of tennis, and strawberries, so I thought up a little creative recipe, which takes a little time and care but is well worth it. These little tarts would be perfect to pack up for a picnic to eat on Murray Mount/Henman Hill, or to have with afternoon tea whilst you celebrate the final with friends & family, although let’s be honest you don’t really need the tennis to enjoy these tarts, because they are simply divine all on their own. The lime in the strawberries makes these tarts really refreshing and cuts through the rich creamy custard, and crumbly pastry. The perfect mouthful (or three).

Ingredients

Pastry

200g Plain Flour

1 tbsp Icing Sugar

50g Lard, Diced

50g Butter, Diced

1/2-1 Medium Egg, Beaten

Strawberry Base

400g Strawberries, washed and diced

Zest and Juice of Half a Lime

1 tbsp Caster Sugar

Custard Topping

300ml Milk

1 Vanilla Pod/1tsp of Vanilla paste/Extract

2 Large Eggs plus 1 Egg Yolk

50g Cornflour

75g Soft Unsalted Butter, Diced

Jelly Top

1 Pack of Lime Jelly

1/2 Pint of Water

3-4 cubes of melted white chocolate

Method

You can make the jelly, custard and pastry cases the day before, and assemble when needed.

Start by making the jelly

1. Melt the jelly cubes with a bit of water in a microwave, then top up with water to create 1/2 pint of liquid.

2. Line a tin with clingfilm roughly 20  by 20 cm (but this is just a guide) then pour in the jelly mix so its roughly 1/2 cm thick. Leave this in the fridge to set.

Pastry

1. In a food processor blend together the ingredients, minus the egg to form a breadcrumb like texture, add the egg bit by bit until the mixture comes together to form a dough. Be careful not to over mix, as this will activate the gluten giving you a tough pastry. If you do not have a food processor, you can rub together the flour, sugar and fats with your finger tips, then add in the egg and knead together.

2. Wrap in cling film and leave to chill for about half an hour to allow the dough to relax.

3. Once its chilled, you can start to roll out the pastry, I do this between two sheets of clingfilm which allievates the need for extra flour and it makes much less mess. I used a 24 hole (4.5cm) petit four tin, but if you dont have this you could simply make your tarts a little bigger. Try and roll the pastry as thin as you can, it requires a delicate hand, and some patience (as I discovered) as the dough is quite fragile, but the end result is so short and delicious, almost like shortbread. I used a 7cm cutter to do this, and trimmed the edges, with a smaller cutter to neaten – this is optional, but remember to not trim too much as the pastry can shrink.

4. Fill the pastry cases with squares of non-stick paper, and fill with baking beans/rice/dried pulses and refridgerate again to rest before baking for about 15-20 minutes. At this point preheat your oven to 200c/180c fan.

Tarts

5. Bake in the oven for about 15 minutes, then remove the paper and baking beans, you can brush the insides with a little egg white left from the custard filling but this is optional. Return to the oven for another 5 minutes, until golden brown, as Mary Berry would say, we don’t want any soggy bottoms.

6. Leave to cool fully in the tin before carefully transferring to a wire rack.

Whilst the pastry is relaxing you can start the custard filling (créme mousseline)

Custard Filling

1. Bring the milk & vanilla pod just to the boil, then remove from the heat and allow to infuse for ten minutes.

2. Meanwhile, whisk together the sugar, eggs, egg yolk, and cornflour until smooth and creamy.

3. Remove the vanilla pod from the milk, then pour through a sieve onto the egg mixture, whisking well.

4. Pour this mixture back into the washed saucepan and set over a medium-low heat and stir constantly to ensure that lumps don’t form. Do this until the mixture boils and thickens – this should take about four minutes. The mixture should be thick enough to pipe. Stir in the butter whilst still warm.

5. Transfer to a bowl, and cover the custard directly (so that it touches the custard) with clingfilm, to stop a skin forming, leave to cool then refridgerate until needed.

Strawberries

1. In a bowl, add the diced strawberries, lime zest and juice and sugar, stir and refridgerate until needed. With the other half of the lime why not make my Green Twister  Smoothie.

Assembly

Now all of the constituent parts are ready, comes the fun bit – the assembly.

1. Simply take half a teaspoon of the strawberries and fill each tart case – the strawberries would have created some liquid, try and avoid filling the cases with lots of liquid as the pastry will go soggy.

2. Pipe over the top the custard filling, you may want to give it a beat to loosen it after its firmed up in the refrigerator. If you don’t have a piping bag, you can use a teaspoon and spoon a bit in each one to fill the cases nearly to the top.

3. I then cut the jelly using a 3.5cm cutter and piped on a swirl of white chocolate, and topped the tarts with this. This bit is optional, but completes the tennis theme.

There you have it, 24 delicous tarts – don’t worry if some break, mine did too – just use the bits of pastry with some of the left over custard and call it cooks perks! I know this recipe is quite long, and contains a few different parts, but I promise you these are well worth the effort!

Let me know what you think, I hope you enjoy them as much as I, and my family did.

A girl with an appetite for all things creative,

Maria x